
Extending Microsoft 365 Copilot’s capabilities is a powerful way to use AI in even broader use cases. Creating your first agent from Copilot Business Chat is relatively easy, and hopefully, you will want to share it so that others can also benefit from the capabilities.
I’ve had numerous requests and questions on how to share the Copilot Agents with others. The thing is, the sharing experience and capabilities differ based on the agent’s version.
- Sharing the Copilot Studio Agent Builder agent in BizChat is simple and straightforward, but the agent’s capabilities and sharing controls are limited.
- Sharing Copilot Studio extension for M365 Copilot has more capabilities, and different controls and settings are available.
Quick Links
- Conclusion Based on Experience
- Sharing Copilot Studio Agent Builder agent in BizChat
- Copilot Studio extension for M365 Copilot – Share with Link
- Copilot Studio extension for M365 Copilot – Admin approval
- Enable or Disable Agents
- Copilot Agents from Copilot Studio
- Copilot Agents from Business Chat
In my tests, the agents were created and shared with regular users with Microsoft E5/E3 and Microsoft Copilot licenses.
Conclusion Based on Experience
Usually, conclusions are added as the last chapter, but in this case, I think it is worth going through the findings and thoughts right at the beginning.
In general, I’ve heard numerous concerns regarding sharing these Copilot Agents. Many organizations haven’t had enough time to understand what they are and how to govern them. I know that the request and wish to be able to disable or have complete administrative control over the sharing comes through this.
Currently, there is no possibility of creating this type of fully controlled process. The situation is like with other Power Platform tools, where users can share their solutions.
As a low-code tool, I understand this situation, but my urgent ask for Microsoft is a tool to monitor all different types of agents. We want to see what our users have created, how much they are used, and where the agents are connected.
Sharing Copilot Studio Agent Builder agent in BizChat
- Users with a Microsoft M365 Copilot license can create and share these with other licensed users.
- You can share the agent to be available to individual users, security groups, or all users.
- You can only share the agent for viewing and editing.
- You can only share these agents with the Entra ID Security group. Microsoft 365 Group, aka team members in Teams, is not an option.
- You should notify the shared users with a message and a link from the share settings so that they can install the agent.
- There is no admin control workflow, such as approval, other than enabling/disabling the agents in general.
- Deleting the permissions for the users didn’t prevent the usage for those who had installed it earlier.
Copilot Studio extension for M365 Copilot – Share with Link
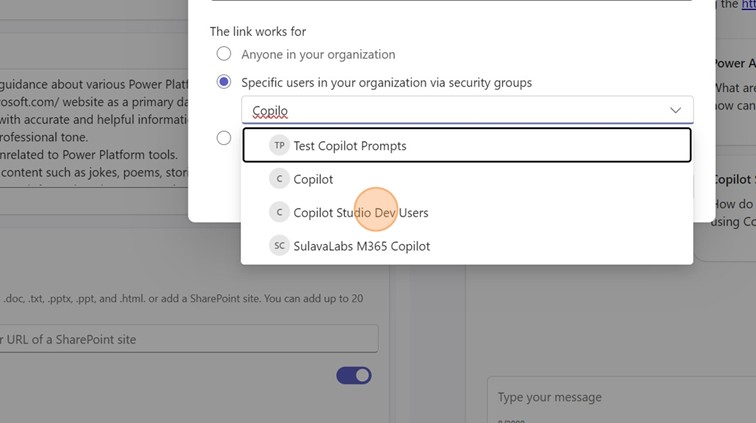
- You can share the Copilot Studio agent by setting permission for users or groups.
- You can set permissions for viewing, usage, and for editing.
- You can use Entra ID Security Groups and Microsoft 365 Groups to share.
- There is a setting that indicates that users are notified for the sharing, and the agent is listed in the app section for the Add App experience, but these settings didn’t work during the testing.
- You should notify the shared users with a message and a link from the share settings so that they can install the agent.
- Deleting the permissions for the users didn’t prevent the usage for those who had installed it earlier.
Copilot Studio extension for M365 Copilot – Admin approval
- Admin approval for publishing is necessary if you want the agent to appear in the tenant’s app store.
- The agent’s creator starts the process, and the agents are sent for approval in the Microsoft 365 Integrated Apps service.
- From there, the approval and publishing process follows the normal process for integrated apps.
- There are two things to notice regarding the permissions:
- Users to whom the Integrated App is shared in the Admin Center do not need extra permission set in the Copilot Studio’s agents’ settings.
- Even if the user cannot access the Integrated App, it’s still possible to share and give user permissions at the agent level throughout the Sharing settings.
- Deleting the permissions for the users didn’t prevent the usage for those who had installed it earlier.
I added a couple of step-by-step instructions below so you can see what different options look like. You can also find detailed instructions for sharing and publishing the Copilot Agents from Microsoft documentation. I added the links below in different sections.
Enable or Disable Agents
The first thing to consider in your organization is whether you want the users to be able to use and create agents in the first place. The agents are enabled by default.
Microsoft documentation: Manage Copilot agents in Integrated Apps – Microsoft 365 admin | Microsoft Learn
- The settings for the agent’s availability can be found in the Integrated Apps -section in the Microsoft 365 Admin Center.

- Click the gear icon from the Available Apps section to access the settings.
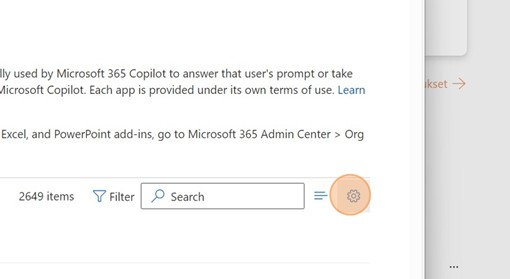
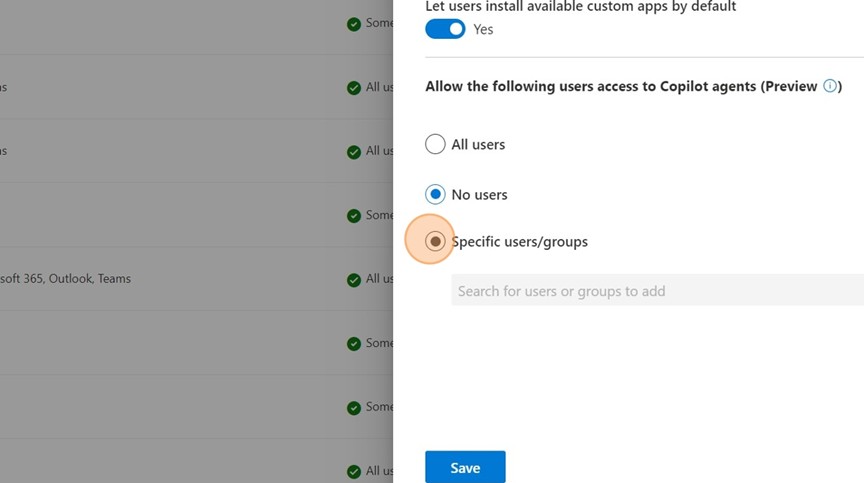
- You can disable the Copilot agents, target them to users or groups, or enable them for everyone. The default setting is enabled for All users.
Copilot Agents from Copilot Studio
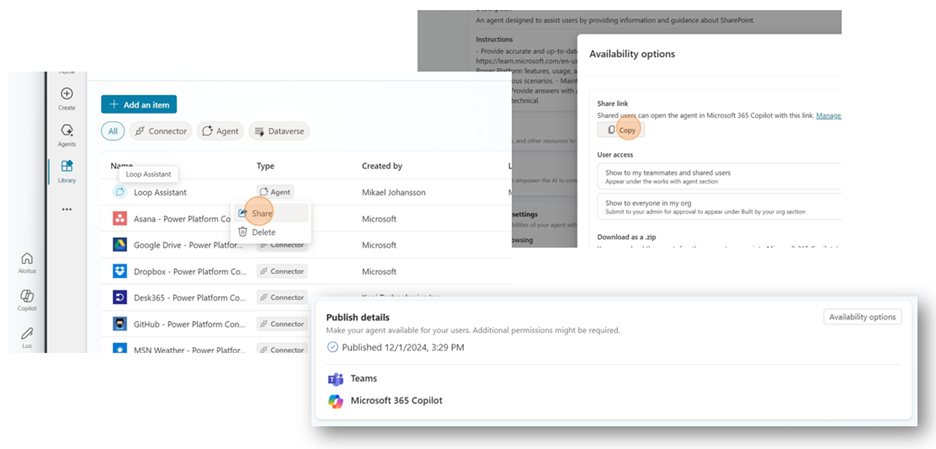
For the best control and user experience, I prefer to build Copilot Agents with Copilot Studio. After creating the Copilot Agent, you must first publish the agent. After that, you can share with the agent in several different ways.
- With Copilot Agent in this context, I mean an agent created through the Library section in the Copilot Studio editor.
- Creating the Copilot Agent from Copilot Studio gives you more features (like actions) and more sharing capabilities.
- These agents can be shared with both security and Microsoft 365 groups.
Microsoft documentation: Share agents with other users – Microsoft Copilot Studio | Microsoft Learn
Publish with Users
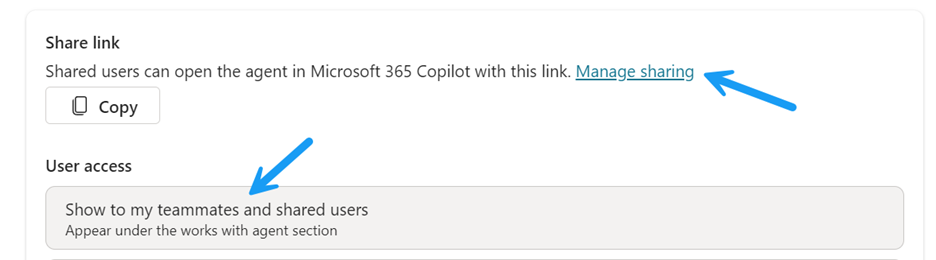
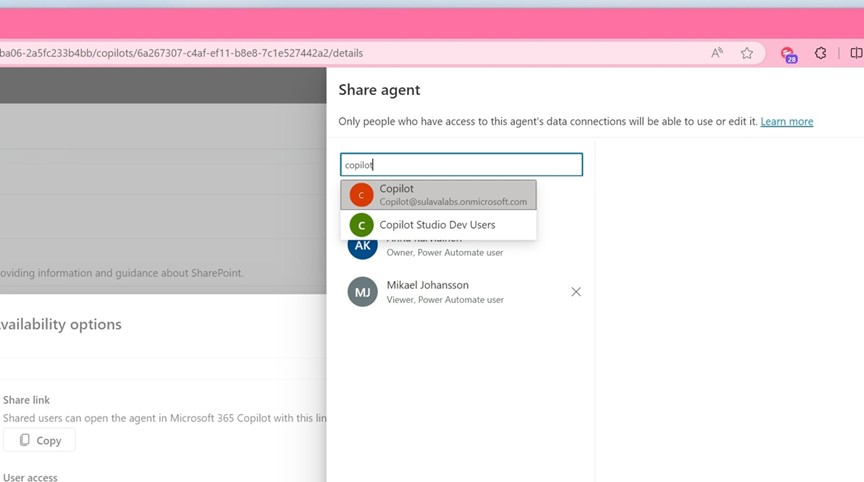
- First, set the necessary permissions for the users by clicking the Manage sharing link or Show to my teammates and shared users.
- Find the users you want the agent to share.
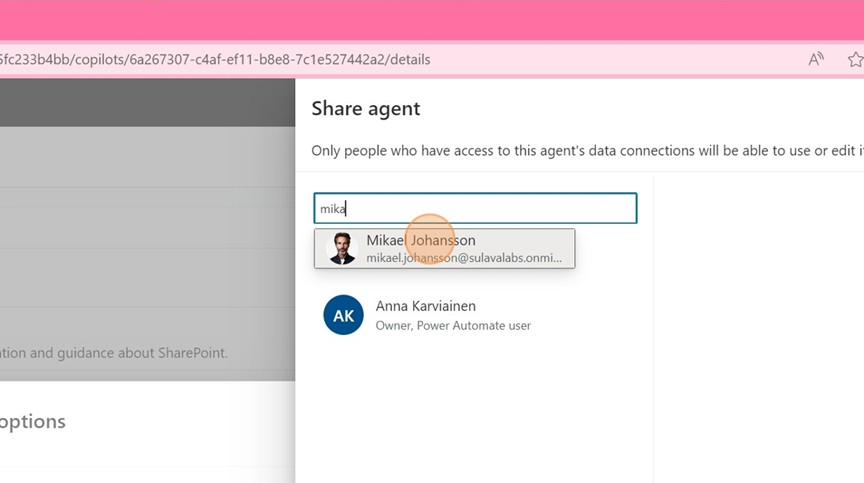
- You can decide whether the shared users can only chat with the agent or can collaborate (view, edit, configure, share, and publish) with the agent.
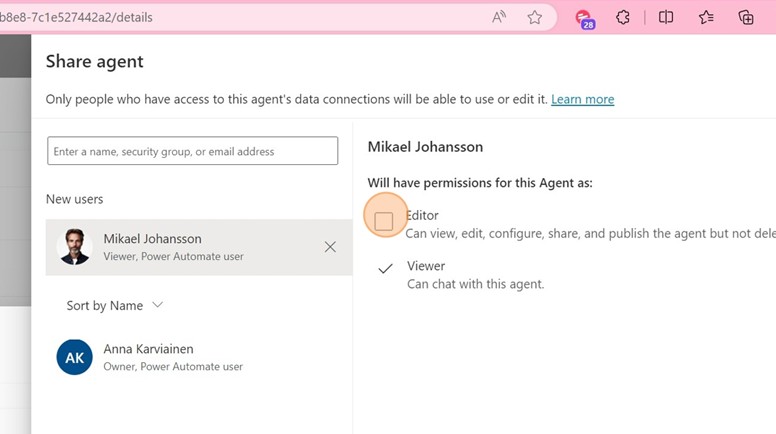
- There is also a setting to notify users that the agent has been shared.
- When writing this article, I noticed that sending notifications wasn’t working with individual users or with no email-enabled group members.

Publish with Group
Publishing with a group follows the same process as publishing to the individual user. The good news is that you can share agents with both security and Microsoft 365 groups.
Publish as an Integrated App
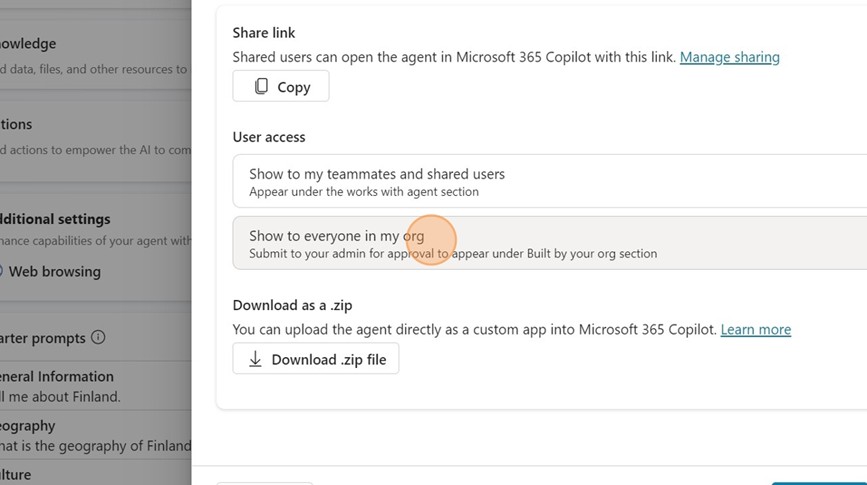
Admins can feature your agent prominently as an app in the Built by Your Org section of Microsoft Teams, pre-install for users in your org, and more. This process needs administrative approval through the Integrated Apps process.
Microsoft documentation: Manage Copilot agents in Integrated Apps – Microsoft 365 admin | Microsoft Learn
- Start the approval process by selecting “Show to everyone in my org. Submit to your admin for approval to appear under Built by your org section.”
- Check the notes and click Yes if everything is in order.
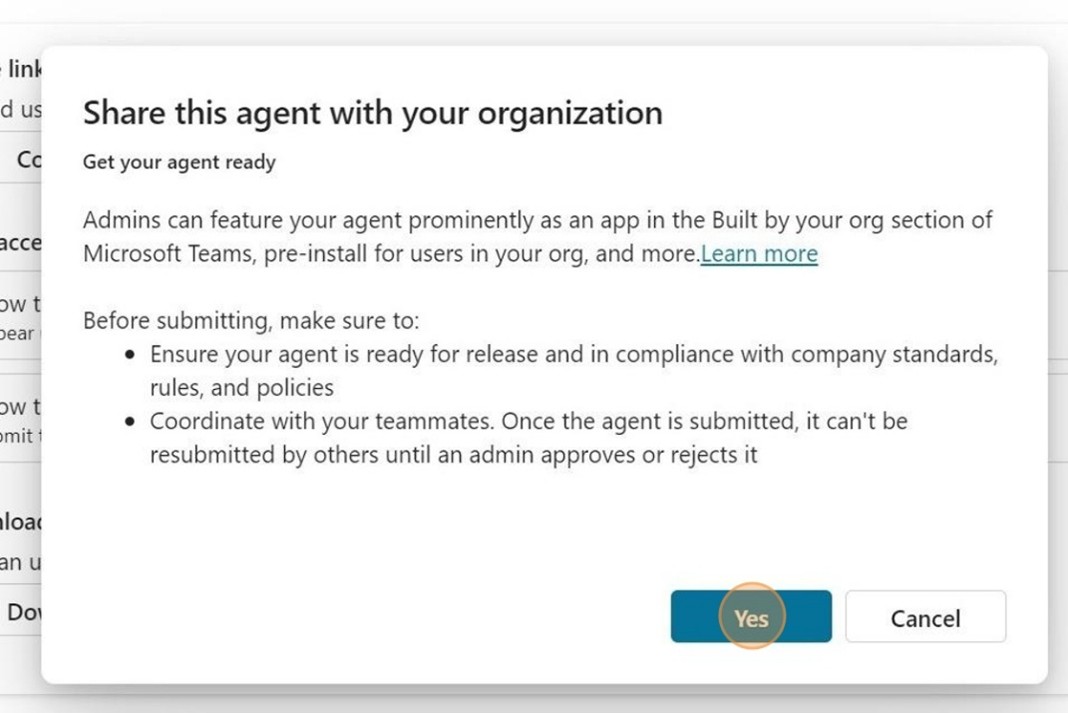
- After this, the agent is sent for approval. You or your administrators need to go into the Integrated Apps section in the Microsoft 365 Admin Center.
- The agent can be found under the Requested Apps section.
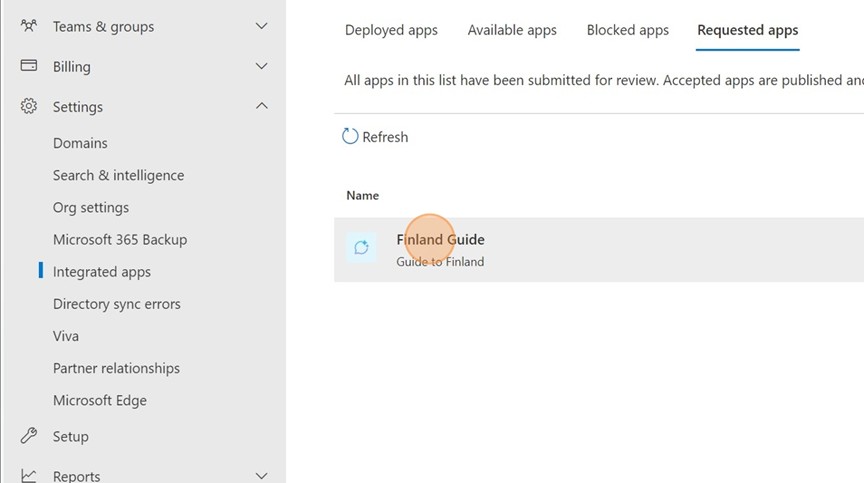
- Select the agent, check the details, and either Publish or Reject the request.
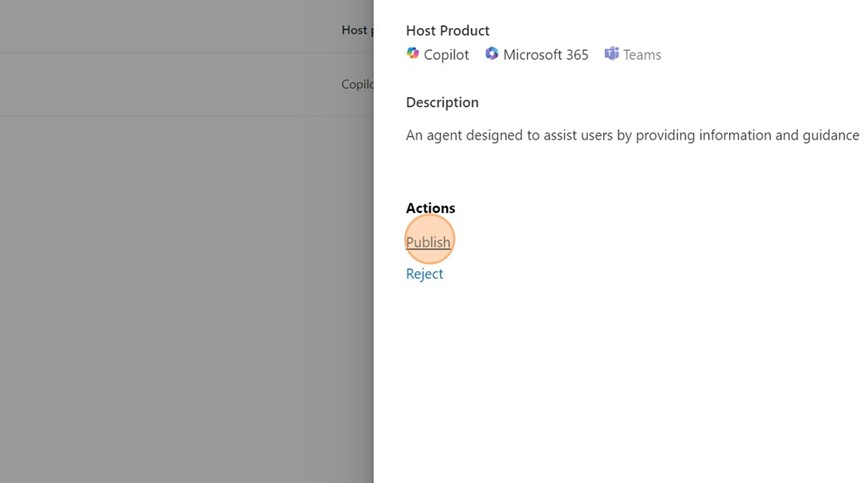
- You need to confirm the action.
- In default settings, the agent is published to the app store for everyone in your organization. You can change this setting from the User settings of the Integrated app.
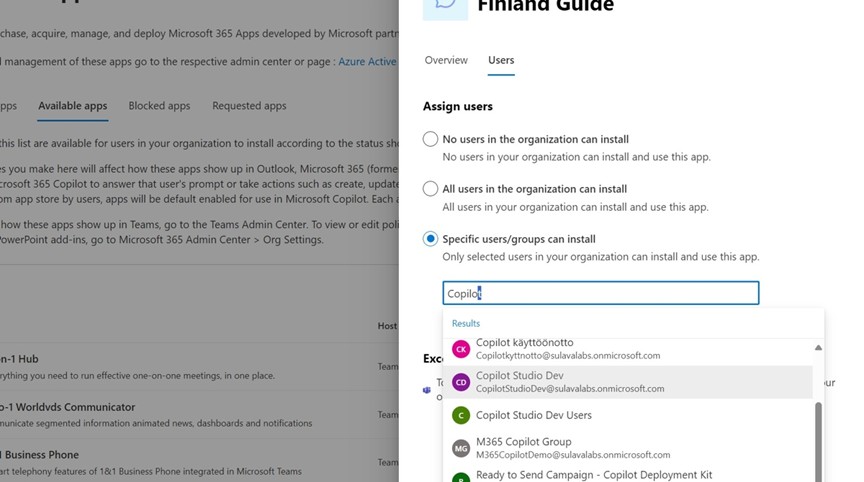
- This setting will control who can see and access the agent from the tenant’s app store.
Note regarding the possibility of adding the agent that I asked for earlier. It’s possible to block the application installation from the Teams admin center from the users. It seems that the users can still add and access the agents regardless of that setting.
Nice to Know Things
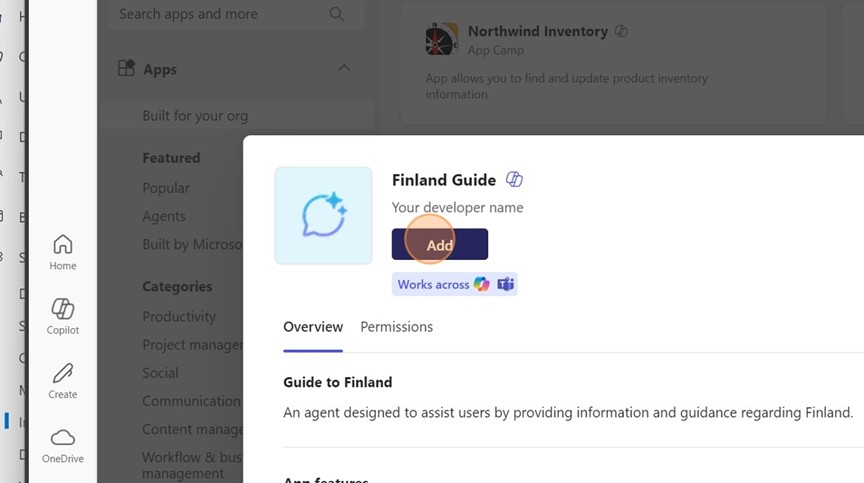
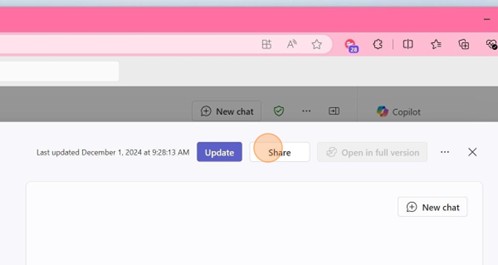
You can always update the permissions and sharing settings by opening the agent and opening the Availability options. Also, after sharing the agent, I recommend sending users a link to ensure they can find it. With the link, users can add the agent to their M365 Copilot. There is also a possibility of quickly updating the agent’s permission under the three-dot menu in the library listing.
Copilot Agents from Business Chat
Using the Copilot Studio Agent Builder in BizChat is probably the easiest and quickest way to build agents. These are the true low-code options that we see people explore first when they want to create some target AI tools for their needs.
- By default, the agent is available only for the creator.
- Sharing the agent is done quickly from a typical Office 365 sharing experience.
- You can share the agent with all individual users or security groups.
Microsoft documentation: Publish and Manage Copilot Studio Agent Builder Agents | Microsoft Learn
Publish Example
- After publishing the agent, you set the sharing options by clicking the Share button.
- Below, you will see the different options for sharing – anyone, user, or security group, only you.

- Select the desired sharing option. While you type the details, a filtered list of users and security groups is offered.
- Click the Save button to activate the sharing settings.
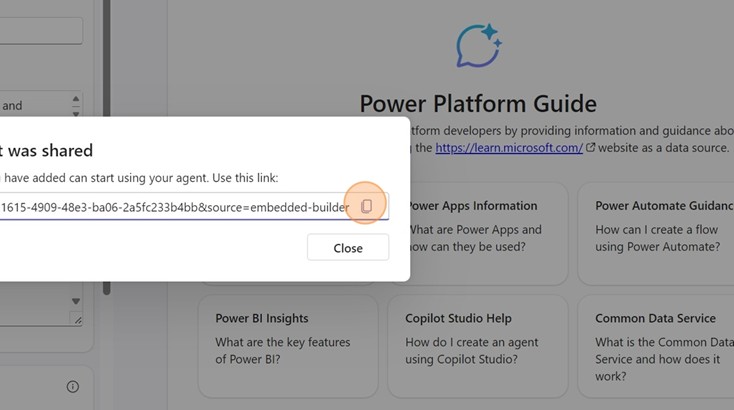
- On the next screen, you will see a link and copy button. Send this link to your users so they can add the agent themselves.


Leave a comment