Modern agents must do more than just answer questions—they execute business actions, trigger workflows, and interact with enterprise systems. Many organizations already have backend capabilities for these tasks through services such as Azure Logic Apps, Azure Functions, and Azure API Management-managed APIs. The main challenge is making these capabilities accessible to agents securely and efficiently.
Azure API Management now allows APIs to be exposed as MCP servers, enabling direct connections from enterprise integration services to agent platforms like Copilot Studio. Organizations can publish existing APIs in formats suited for AI assistants, eliminating the need to create new automation for each scenario.
Implementation Guide – Copilot Studio + MCP Server
- Part 1: MCP Servers in Copilot Studio – Connecting Azure API Management and Logic Apps
- Part 2: More complex tools and securing the MCP with oAuth settings (coming next)
- Part 3: MCP with Copilot Studio – Governance and deployment (coming soon)
I decided to write this Copilot Studio + MCP server series help you to integrate and use Azure capabilities with your agents. We will discuss what these new MCP capabilities mean for Copilot Studio makers, how to expose Azure Logic Apps as MCP-enabled services, and provide a practical example of connecting such a service to a Copilot Studio agent in secured and managed way.
The target of this series is to walk you through the most relevant real-world settings and technical details.
- Implementation Guide – Copilot Studio + MCP Server
- Azure Service – Why it Matters for Copilot Studio Agents?
- Azure API Management – Exposing MCP Server
- Securing the MCP Usage
- Using MCP Server with Copilot Studio
- Agent with MCP – Publishing Considerations
Azure Service – Why it Matters for Copilot Studio Agents?
But wait, we have Power Automate, why would we care about Logic Apps or Azure Functions?
When building Copilot Studio agents, it is easy to focus primarily on tools available inside the Power Platform ecosystem. Power Automate, connectors, and built-in actions are often the first integration mechanisms makers reach for. In many cases that approach works well.
However, as agents start interacting with more complex business processes and enterprise systems, integration requirements often become more demanding. Workflows may need to orchestrate multiple systems, handle larger payloads, implement advanced error handling, or integrate with existing APIs in an organization’s Azure environment.
This is where Azure integration services start to become highly relevant.
Many organizations already run critical integration workloads using services such as:
- Azure Logic Apps
- Azure Functions
- Azure API Management
- Event-driven services such as Service Bus or Event Grid
Power Automate vs Azure Logic Apps
Both services share the same workflow engine heritage, but their target use cases differ significantly.
| Capability | Power Automate | Azure Logic Apps |
| Primary audience | Business users and citizen developers | Developers and integration specialists |
| Typical usage | Business process automation and user-driven workflows | Enterprise integration and backend orchestration |
| Scale and throughput | Designed for business workflows | Designed for high-scale and system-to-system integrations |
| DevOps and CI/CD | Limited but improving | Strong support for CI/CD and infrastructure-as-code |
| Integration patterns | Connectors and workflow actions | Advanced integration patterns, APIs, events |
| API exposure | Usually consumed through connectors or flows | Easily exposed as APIs via API Management |
| Identity and authentication | Connector-based authentication, typically user or service connections | Native Azure identity models including Managed Identity and Entra ID |
| Network security | Limited network isolation capabilities | Supports private endpoints, virtual networks, and network-level controls |
| API governance and policy control | Managed mainly through Power Platform governance and DLP | Full API governance through API Management policies, throttling, monitoring, and access control |
Power Automate is often the best choice for user-driven automation scenarios inside Microsoft 365 and Power Platform environments. Logic Apps become more appropriate when workflows act as integration services between systems or when they need to operate as reusable backend capabilities. Instead of rebuilding logic integration specifically for an agent scenario, organizations can expose existing enterprise capabilities in a way that agents can consume.
What Does This Mean for Copilot Studio Professionals?
Agents can act as conversational interfaces that trigger well-designed backend workflows rather than contain all process logic themselves. For pro-level Copilot Studio makers, understanding the Azure integration landscape becomes increasingly valuable.
For Copilot Studio makers, this opens up a broader architectural approach.
Learning how to connect agents to Azure integration services offers several advantages:
- Reuse of existing enterprise workflows, API’s, and integrations
- Better separation between conversational logic and business processes
- Improved scalability and reliability for agent actions
- Alignment with enterprise integration architecture
- A cleaner governance model for shared agent capabilities
This is why the ability to expose APIs as MCP servers through Azure API Management is particularly interesting.
Azure API Management – Exposing MCP Server
There are two options to expose a Logic Apps through the MCP server. The first option is to use Azure Logic Apps Standard services. With the standard option, you group related workflows into logical MCP server group that can then be used with our agent. But of course, there’s the cost factor to consider with Logic Apps Stand.
I decided to go with a consumption model, and at the same time, this opens the possibility of grouping multiple API types into a single MCP server if needed.
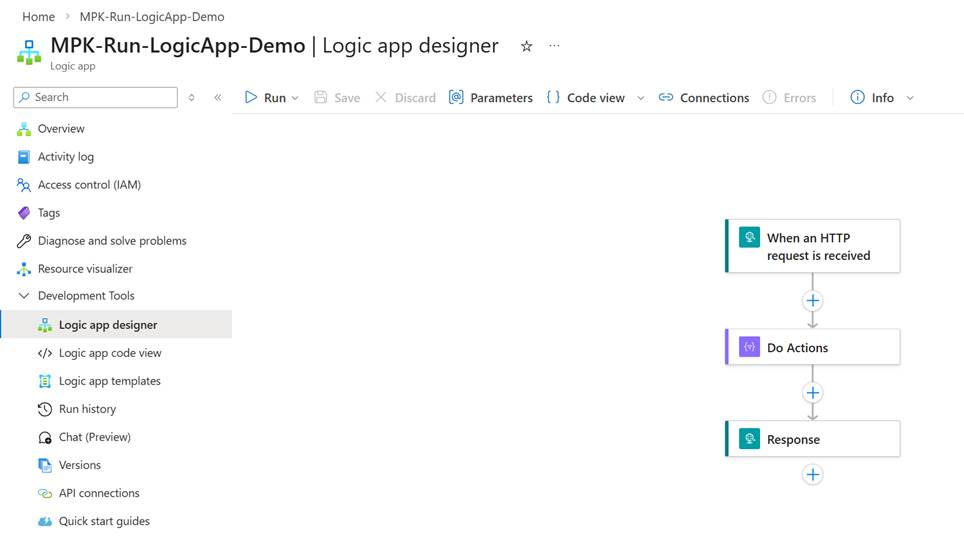
For this article, I created just a simple Logic App that is initialized with an HTTP request, makes a simple action, and returns a response. Of course, in real life, the functionality is often more complex. I also created a consumption-type Azure API Management service.
Create Your Services
- Create Consumption Workflows with Azure Logic Apps in Portal – Azure Logic Apps | Microsoft Learn
- Quickstart – Create Azure API Management instance – Portal | Microsoft Learn
Logic Apps to API Management
Importing a Logic App as a REST API to API Management is made simple with a straightforward import tool.
Import a logic app as an API by using the Azure portal | Microsoft Learn
- In the left menu of the API Management service, select APIs
- Then select + Add API
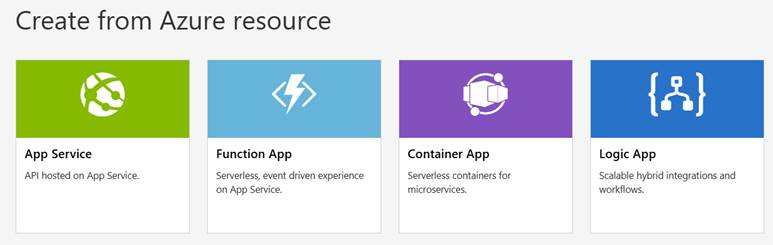
- Select Logic App in the Create from Azure resource list
- Follow the step-by-step instructions.
NOTE!
Before continuing, let’s think about how the agent knows how to use the MCP server capabilities? The agent can then read all the tool descriptions exposed and select the one that most closely matches the action it’s looking to take.

With default import settings, you will end up with descriptions that are not really useful (look at the image below), which might cause problems when you build and use the agent.
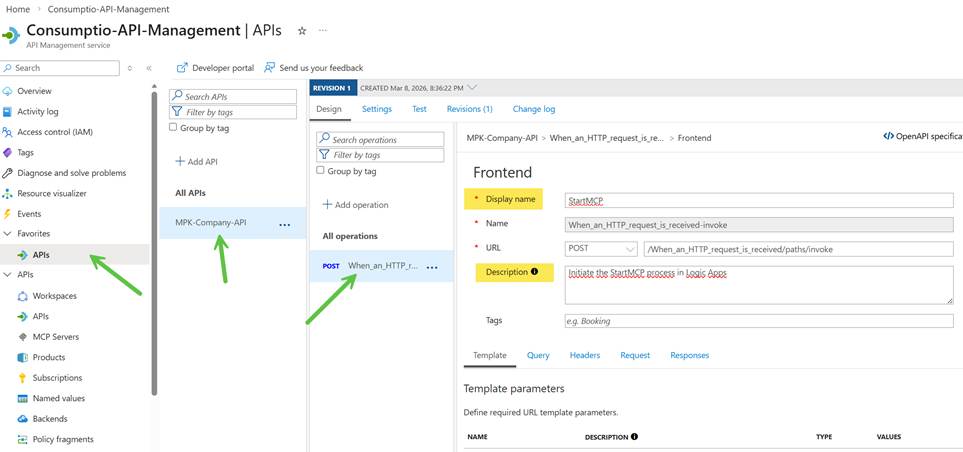
Before proceeding to the next steps, take a moment to plan and rewrite the names and descriptions of the API operations.
- Select APIs from the left menu -> select desired API -> select the operation -> Click edit for the Frontend definitions
- The dame and description here will be the one that are used in the Tools of Copilot Studio.
Expose API as an MCP Server
In general, the steps to expose the API as MCP server are straightforward. There are some things to consider, so please, check the following sections below.
Expose REST API in API Management as MCP server | Microsoft Learn
- In the Azure portal, go to your API Management instance.
- In the left menu, under APIs, select MCP Servers > + Create MCP server.
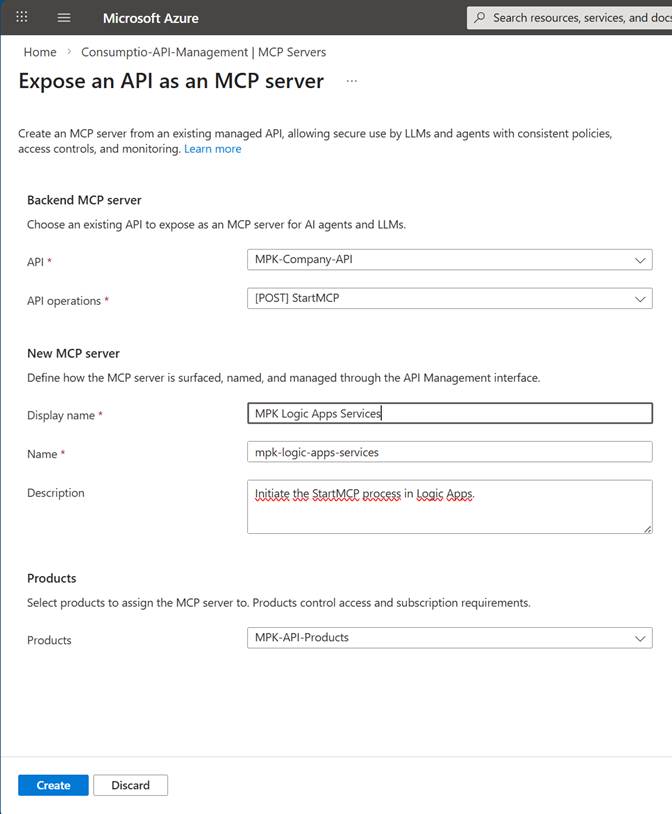
- Select Expose an API as a MCP server.
- In Backend MCP server:
- Select a managed API to expose as an MCP server.
- Select one or more API operations to expose as tools. You can select all operations or only specific operations
- In New MCP server:
- Enter a Name for the MCP server in API Management.
- Optionally, enter a Description for the MCP server.
- Select Create.
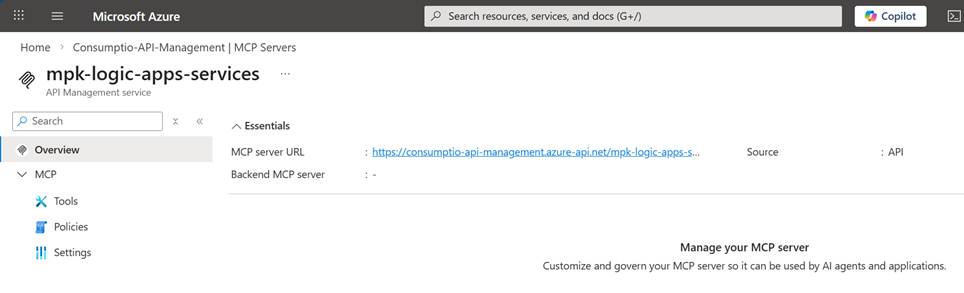
This will create the MCP server and give you the details of URL that you can then use on Copilot Studio or other agent building services.
Securing the MCP Usage
There are several options you can use to secure the user’s connection to the MCP server. Of course, None is an option, but this is hardly ever the case in real enterprise usage. You also need to consider the different security options and settings for Logic Apps and the API Management service.
- Secure access and data in workflows – Azure Logic Apps | Microsoft Learn
- Security considerations for Azure API Management – Cloud Adoption Framework | Microsoft Learn
For this basic scenario, I decided to build the following setup:
- Block access to Logic Apps for IP’s of API Management service
- Group API’s inside a product
- Create a subscription key for the product to be used as a basic security mechanism for the connection
There are more tighter options that you need to consider. I think this is the bare minimum you need to use.
Logic Apps – Narrow the IP access
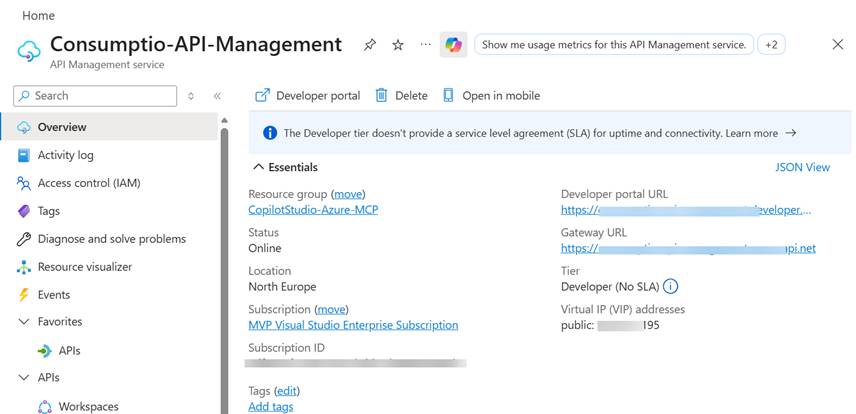
Every API Management instance has public IP addresses that are exclusive only to that instance (found from the Overview details). We can use it to narrow traffic to only this Logic Apps service.
IP Addresses of API Management | Microsoft Learn
In the Logic Apps portal, you set up the desired IP address in the Settings section. Note: the IP address is given in xx.xx.xx.xxx/32 format.
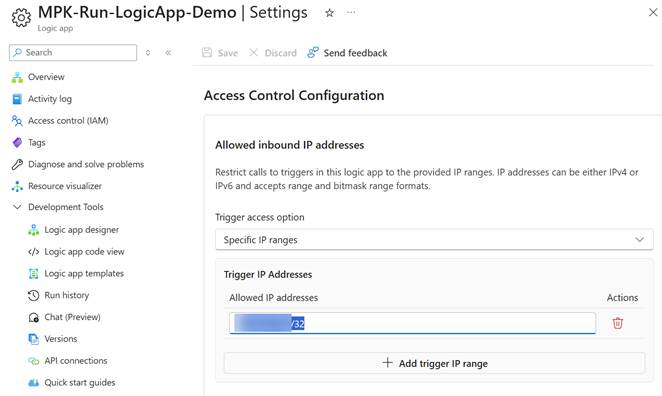
This way, only the calls through the API Management service instance are allowed to start our Logic Apps process.
Set Up Product and Subscription
In this first use case, I decided to use Subscription Keys to manage who can call the APIs. This general setting will also affect MCP server calls. The easiest way to set this up is to create a product out of the APIs.
Tutorial – Create and publish a product in Azure API Management | Microsoft Learn
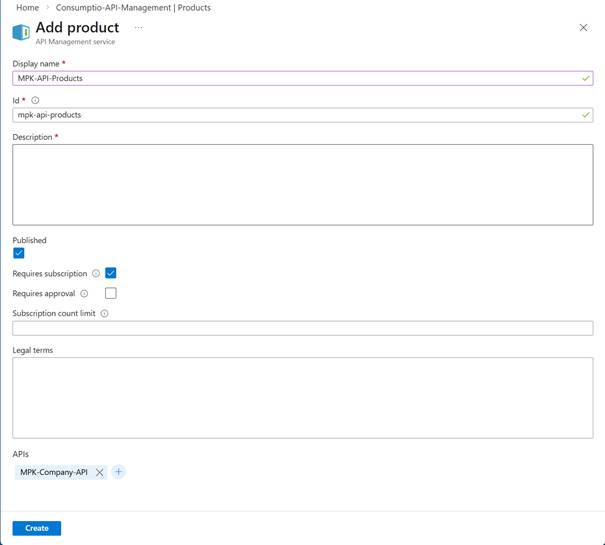
- In the left navigation pane, select Products > + Add
- Give the product group a name and description
- Select Publish, if you want to publish the product in use immediately
- Select Require subscription -> this will create the necessary API keys automatically
- Add the desired APIs to the product
- You can always add more APIs to the product from APIs settings
Using MCP Server with Copilot Studio
Now we are ready to connect our agent to MCP server that is exposed through our API Management service. We could make the connection manually with the Custom Connector, but the new MCP Wizard removes many steps from the process.
- Create the agent
- Go to the Tools page for your agent
- Select Add a tool
- Select New tool
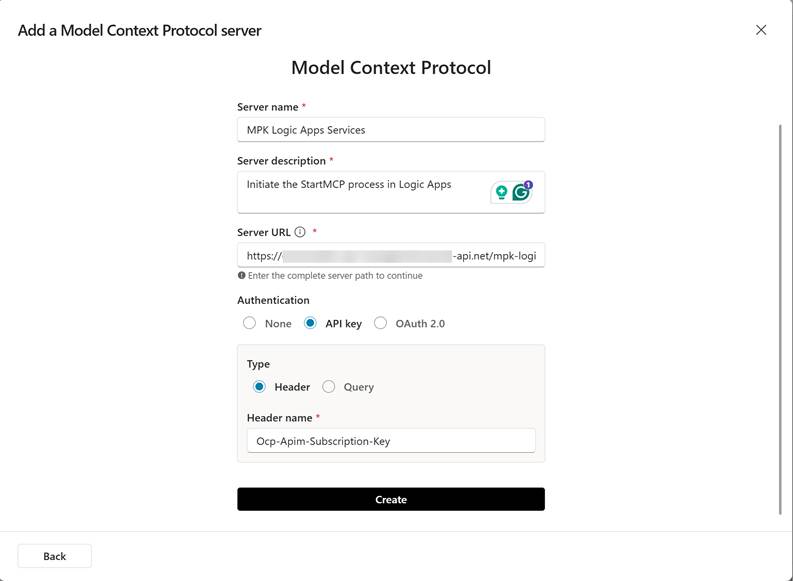
- Select Model Context Protocol. The MCP onboarding wizard appears
- Fill in the required fields Server name, Server description, and Server URL.
- The server URL is found in the MCP server details (see the details in the chapter above).
- For the Authentication, select API key for this time.
There are two types of Keys to use: Header and Query. Enter the name of the header or query parameter where the API key should be included. Note: You can get and set up the parameters in the API Management Settings: APIs from the left menu -> Select API -> Settings -> Subscription section.
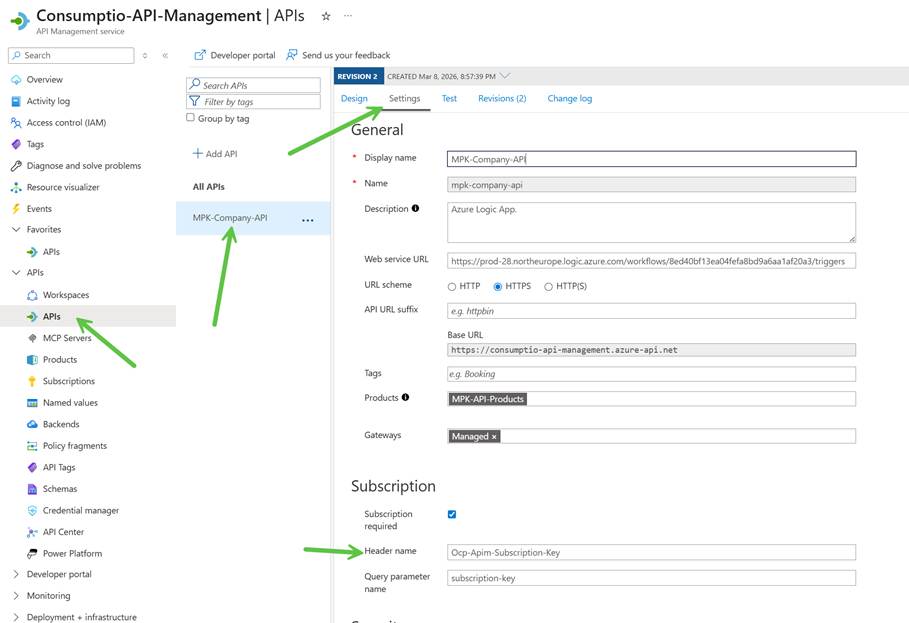
Ensure the key names in API Management and the MCP server settings match.
- Finaly, click Create to create the MCP Server Tool.
- You will need to create a new Connection to the server in the next step.
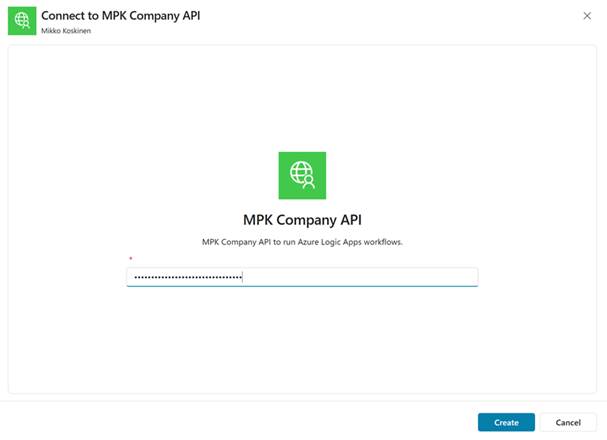
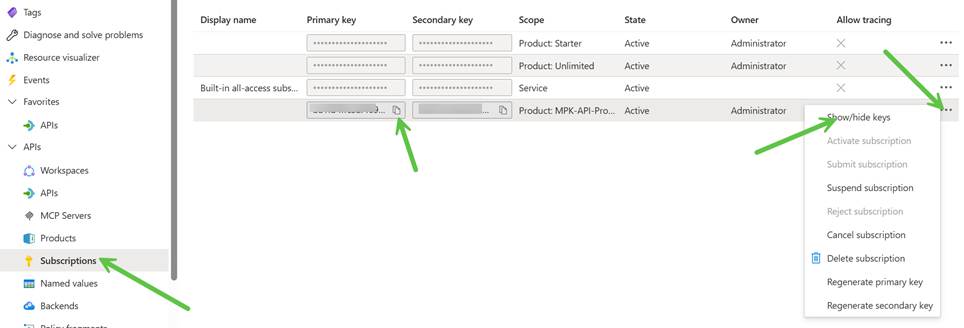
- The connection form is asking the subscription Key in the creation form.
- This key can be found from API Management: Subscription from the left menu -> open menu and show keys -> copy the desired key.
- The server URL is found in the MCP server details (see the details in the chapter above).
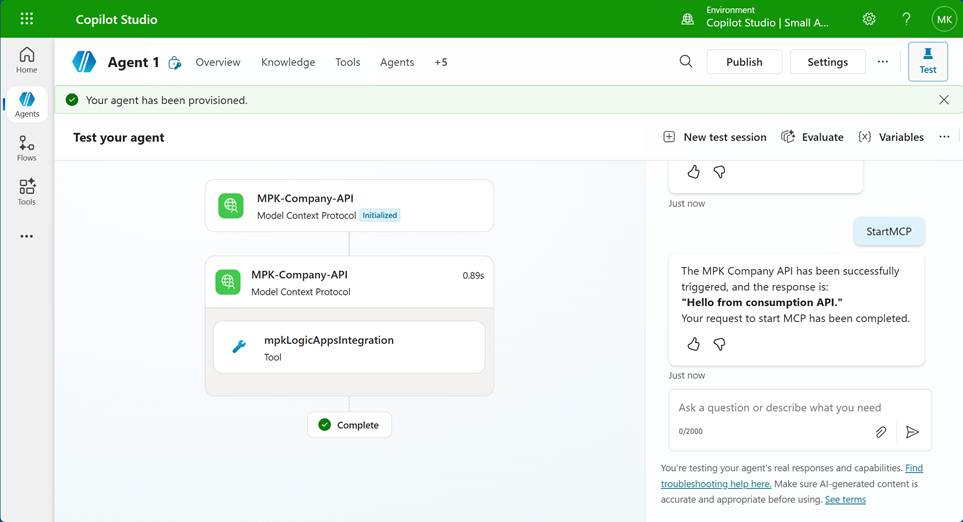
- Note how the more agent friendly names for the tools are used.
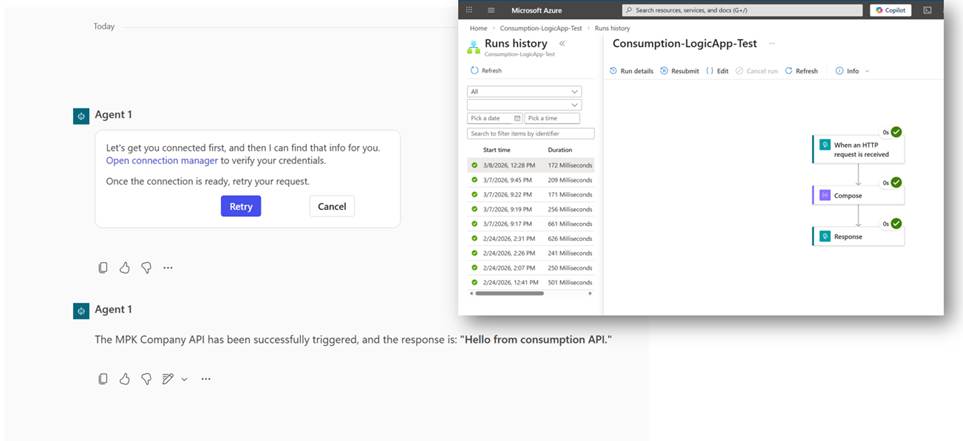
- In this case, the generative orchestration can use the MCP tool for example, when the end user asks to StartMCP.

Agent with MCP – Publishing Considerations
Now we have an agent with the MCP Tool that exposes an Azure Logic App for use. Nice!
There are a few things to consider and notice, especially regarding end-user usage. As you know, there are several ways to publish the agent to end users. At this point, let’s focus on the simplest one, but there are a few notes to keep in mind, especially from the connection point of view.
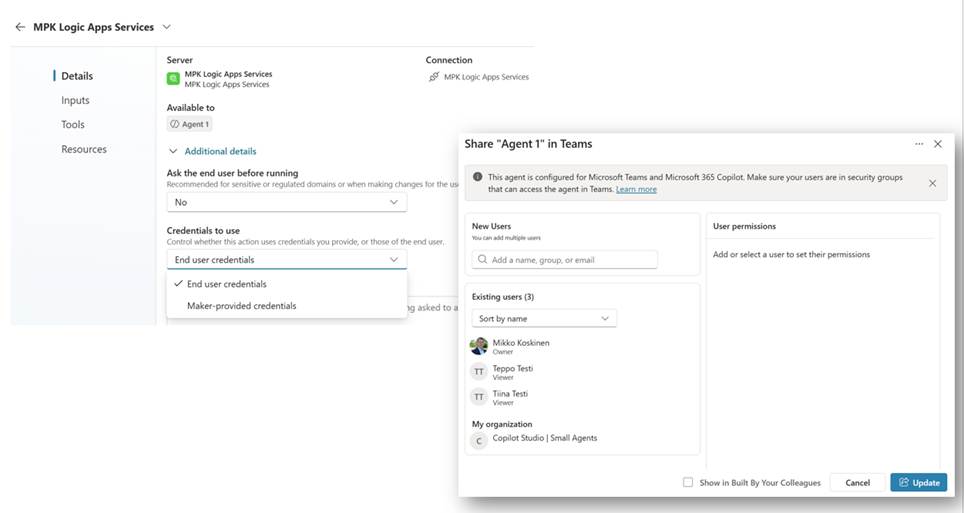
- There are two options for the MCP server connection – End user credentials or Maker-provided credentials
- The agent is shared for an end-user through the agent share functionality
- Users have no access to the agent’s Power Platform environment
The easiest way to handle the MCP connection is to use the Maker-provided credential. In this case, you only need to share the agent and send the link; they can use the agent to call the MCP server functionality. For the end user, this is also easy, because they don’t need to create their own MCP connection; the connection and permissions between MCP and Logic Apps are handled by the creator’s account, which might not be optimal.
Using End User Credentials
Using end-user credentials means the user needs to know the API Key to create the connection and be able to do so. Let’s see this in action and steps needed to enable this.
First, let’s update the MCP Server Tool credentials to use end-user credentials. When the user opens the published agent, they will be notified to create a new connection. But when the user opens the Connection Manager, they will end up in an error page.
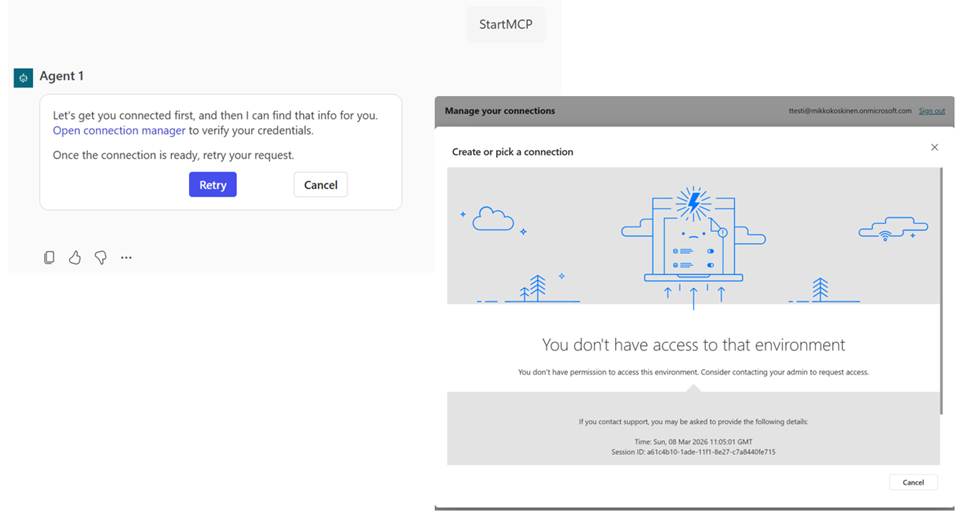
The reason is that the user, to whom we share the agent in viewer mode, don’t have the necessary role and permission to create and use a personal connection in the PP environment.
Least Privilege Security Role for Connection
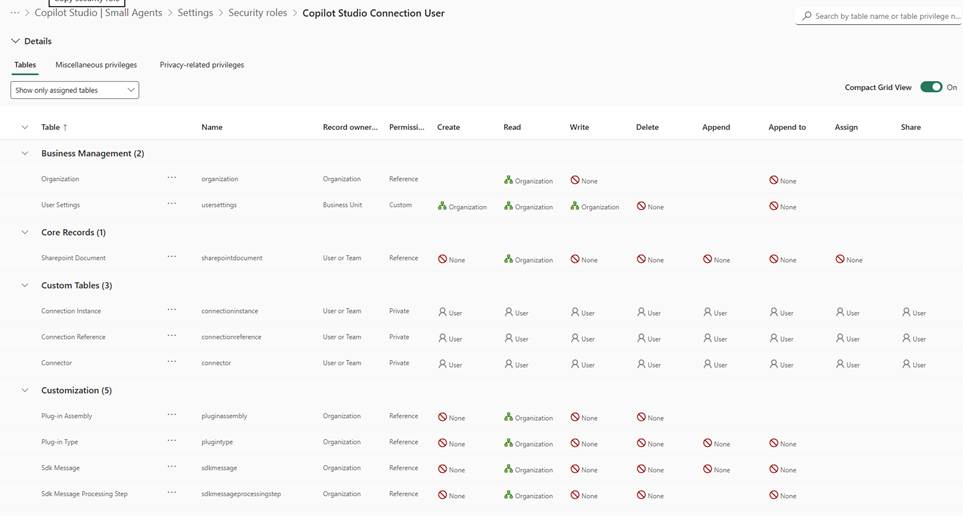
I could, of course, give the user a default Basic User role, but I wanted to understand the bare minimum role settings to use. What we need is to have the permissions to read basic Organization, User Settings, and modification permissions to Connection-related tables.
I decided to create a custom Dataverse Security role “Copilot Studio Connection User” from scratch. Create or edit a security role to manage access – Power Platform | Microsoft Learn. In the role you need to give access to:
- User Settings (read org level)
- User level create, read, write, delete, append for:
- Connector, Connection Reference, and Connection Instance
After this, the users can open the Connector Management page. But as you can see in the image below, they don’t see the connector correctly. If they try to click the Connect nothing will happen.
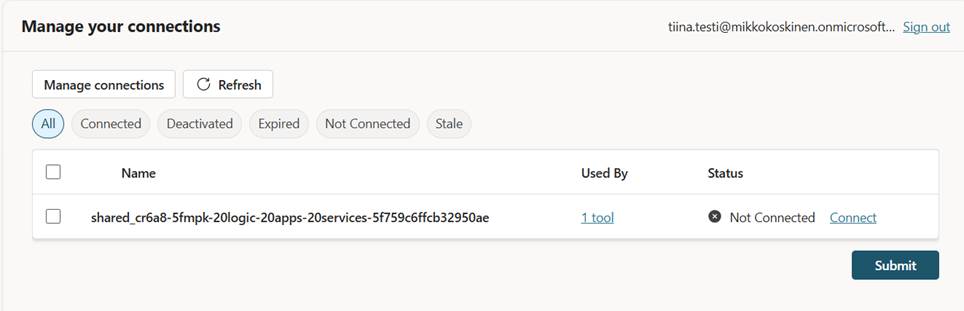
The reason is that the MCP Server connection is actually made through a PP environment-level custom connector. In this situation the end user doesn’t have access to this connector. So, the administrator needs to grant View permissions to the custom connector in the end user’s environment.
Make sure the end user knows the API Key from the API management service because they need it while creating the connection.
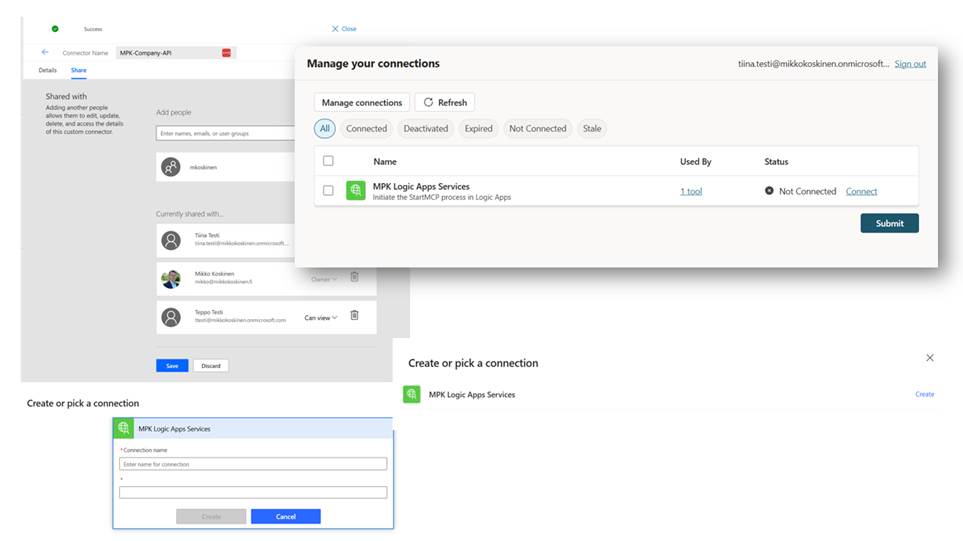
Only after these settings, the user is able to create the connection and start using an agent with our custom MCP Server.

If you’ve managed this far, you should already have a good understanding of how to easily expose your Azure Logic Apps and custom APIs to agents using the managed MCP server. This was a (almost too) long guide, and many areas were left out. I’ll write more details and practical instructions in the upcoming posts.


Leave a comment